


“I have a Netgear WiFi range extender. I have completed Netgear extender setup successfully. But, I am not satisfied with the internet range the Netgear extender is providing me. The culprit is not Netgear. I am an internet lover and I want to connect my Alexa devices, play stations, gaming consoles, iPads, smart HDTV, etc. to it. If I connect a number of devices to the single network, chances are that the WiFi signals may drop. And, I don’t want it to happen. That is why, I bought Rockspace WiFi range extender. Only after seeing amazing reviews about it on the internet, I bought it. Now, the thing is, is it possible to connect two WiFi range extenders? If yes, please provide the instructions. I will be thankful.”
We have recently received these queries from one of your valuable users. And, we replied, yes it is possible to connect Netgear extender and Rockspace extender. In this post, we have mentioned the instructions how to connect them both in a hassle-free way. If you also have the same queries, then stick to this post.
Instructions to Connect the Extenders
Here are the instructions that you can follow to connect your Rockspace WiFi extender and Netgear range extender. Keep reading!
Step 1: First things first, unbox your Rockspace WiFi range extender. Once you are done with the unboxing process, take it near to your Netgear range extender and plug it (Rockspace extender) close to it (Netgear extender). On the off chance if you don’t have a wall socket for your Rockspace extender near to your Netgear extender, go and guy an extension cord. What? You already have it? Fab! Make it in use! We hope that the extender cord is well working?
Step 2: Once you have plugged in your Rockspace WiFi extender near to the Netgear device, the LEDs on it will start blinking. Wait till it gets stable.
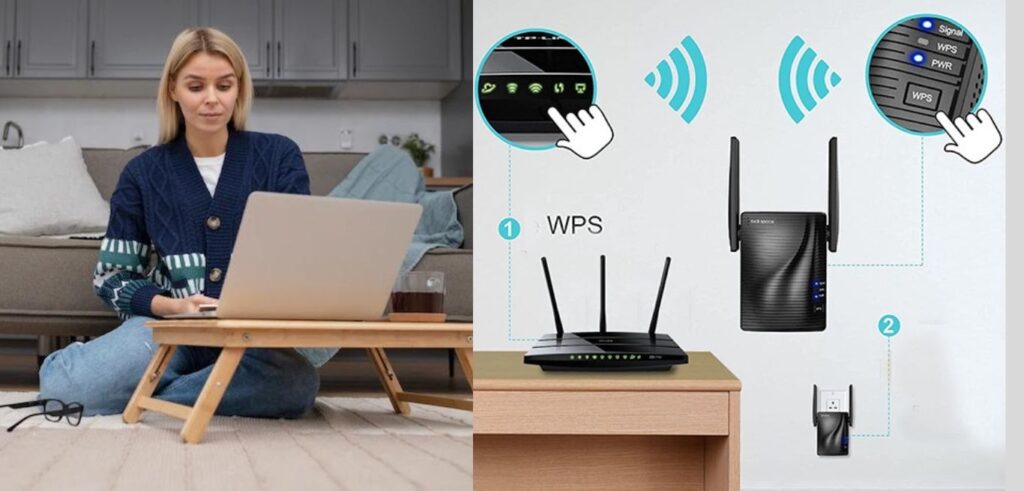
Step 3: Now, locate and press the WPS button on your Rockspace WiFi range extender and wait for a couple of minutes.
Step 4: Thereafter, locate and press the PWS button on your Netgear range extender as well and wait for some time.
Once you are done applying the step 4, you will see that your Rockspace WiFi extender and your Netgear device are connected already. Now, you are the owner of 10x improved internet speed. You can connect as many devices as you can to your newly improved yet extended internet range. Trust us and mark our words, the WiFi signals will never ditch you.
Important Points
- You have to make sure that your Netgear extender and Rockspace extender have the WPS function on them. Keep in mind, not every model of Netgear and Rockspace extender has the WPS button on them.
- If your devices don’t have the WPS button either or only one (Rockspace or Netgear) has it, then we suggest you connect them using an Ethernet source.
Connect the Devices via Ethernet Source
Given below are the guidelines that you can follow in order to connect your Rockspace extender and Netgear extender using an Ethernet source (manually). Continue reading!
- First things first, plug in both of your devices to a working power outlet. Bear in mind, a continuous power supply to them is very important to complete the process with ease.
- Now, have access to a well-maintained Ethernet cable. Use it to connect your Rockspace WiFi extender and Netgear range extender. Do not make damaged or faulty Ethernet cable in use. Otherwise, you will surely bump into many technical-related issues that aren’t easy to resolve either.
- Then, you have to open and laptop or desktop (anything you own) and connect it to your existing WiFi network (SSID).
- Once you are done doing it, launch an internet browser and enter http //re.rockspace.local in the address bar.
Keep in mind, http //re.rockspace.local address will surely not going to work if you have entered it in the search bar. Got it?
- Thereafter, press the Enter key and provide the default login username and password of your Rockspace WiFi extender into the given fields.
- Follow the on-screen prompts and your Rockspace WiFi extender will be surely get connected to your Netgear range extender shortly.
The Last Words
Although the step-by-step instructions provided in this article will surely help you connect your Rockspace WiFi extender and Netgear range extender, in case you are not able to complete the process, don’t hesitate to try the instructions again. But, before doing so, power cycle (restart) your Netgear extender and Rockspace extender once. Good bye and Good luck!
Please read more informative tech. related article