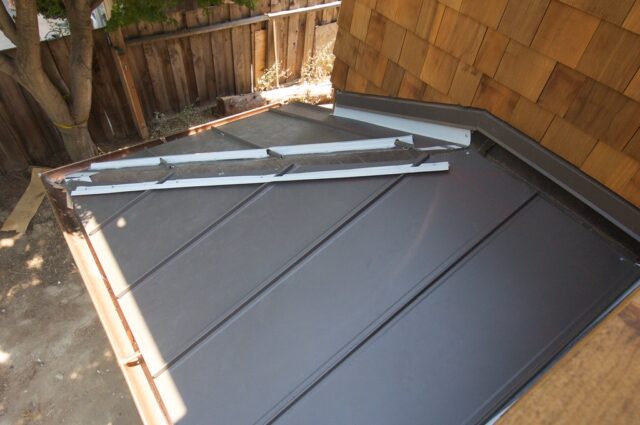
If you own a building with a flat roof or a shed that needs roofing repair, you might be interested in learning how to install roll roofing. It may surprise you that roll roofing is not only one of the most accessible roof types to install but also the most affordable.
If the roof slopes, you can use the exposed-nail method. Use the concealed-nail technique illustrated for a roof with a slight incline. Use double covering for flat or nearly flat roofs, while an EPDM or torch-down modified bitumen roof is preferable.
What is roll roofing?
Roll roofing is a composite roofing sheet that has been formed into a roll so that it can be installed on the roof in overlapping strips. Depending on the style of the top a person wants for their home, several roofing materials can be utilized to form rolls. Roll roofing is an asphalt product with an oil base sold in 100-square-foot rolls. This covering may be rolled out directly onto the roof to shield your building from the elements, much like rolling out the carpet on the floor.
An average 100-square-foot roll of this material weighs only about 75 pounds. Although roll roofing resembles asphalt shingles, it is a less-lasting material since it is thinner and less expensive.Roll roofing is a DIY homeowner’s dream. The supplies are available at practically all home improvement retailers. But before you dash to the store, make sure you know the potential benefits and drawbacks of rolled roofing.
How should roll roofing be installed?
1. Remove the roofing supplies
Install primers WSU only if necessary and drip-edge flashing before starting the installation. The roofing cement should be ready, the edges should be nailed, and any wrinkles should be smoothed. Although flashing can also be applied, you typically need to use an 18-inch-wide strip of roll roofing.
2. Join the first and second sheets together
To start roofing, place the first course precisely where it will hang over the drip edges and advance it a predetermined distance. At one end of the rake, drive the nails every three inches, draw the rake taut, and move the pins further along the eave edge.
The nail should only be 1 inch from the edges for appropriate installation. You can add a 3-foot wide strip on the 18-inch section for extra protection. You should overlap the second sheet by 4 inches when installing it, or you might cover the region with a different kind of roll roofing.
3. Spread the Roofing Cement & Seal the Vents
To ensure that no two butt seams are closer than two feet apart, distribute the roofing cement uniformly and seal the vents. Spread roofing cement 6 inches wide along the edge of the first sheet, then press the following sheet into the adhesive.
Spread roofing cement all around a plumbing vent pipe to seal it. Drill a 2-foot-wide hole in a piece of roofing material to hide the line. At least four inches should be left between the amount and the lower course. In addition, slide the roll roofing over after cutting a hole in it. Put cement between the two roofing sections. Include a boot flashing for further protection.
Read More: A Comprehensive Guide About How To Soundproof A Window?
4. Cross the Valley and add the last component
The installation is finally coming to a close, slowly but surely. The following phase is to span the Valley’s center by 2 feet starting from one roof side. The piece in the Valley’s center can now be softly trimmed by overlaying the Valley on the opposite edge, hitting a chalk line, and cutting along the line. Use a 4-inch broad roofing cement bed to secure everything while keeping the nails 12 inches away from the Valley’s center.
For the final component, use cement and nails to overlap the sheets at the ridge. The last piece does not, however, sink at least 8 inches below the height of the bank. Make sure the cement-embedded peak is completely covered.
5. Adjust for a Sloped Roof
If your roof slopes, cut 9-inch-wide roofing strips, place them flush with the drip edges along the eave and rake, and fasten them with two rows of 3-inch-apart nails. Spread roofing cement over at least half of the strips using a trowel.
The first course should be positioned in the cement with a 1/4-inch overhang. Because it is difficult to move the roofing, place it carefully before rolling it out and pressing it into the glue. Only affix its top edge (the part bare of mineral coating). Apply for the subsequent courses, in the same manner, coating the leading edge with a roofing cement layer 4- to 6-inches broad.
Benefits and difficulties of roll roofing installation
In addition to often being less expensive than building a regular shingle or latex roof, roll roofing offers the following advantages to the homeowner:
- Easy install
- Lasting up to 12 years
- The capacity to be purchased and trimmed to the precise quantity required
Although knowing how to install roll roofing has many benefits, there are also some difficulties. Waterproofing problems could develop if the roof is not installed correctly. Although some roll roofing material can be used on steep or low-sloping roofs, roll roofing is generally not advised for use on sloped roofs due to the difficulties involved. Roll roofing only comprises one layer, unlike the three layers of a conventional shingled roof.
Roll roofing is a more practical option for roofing a shed or a portion of your house that is not visible from the curb because it is also quite plain-looking. It’s not advised to use it if you want to change the appearance of your house entirely.


